
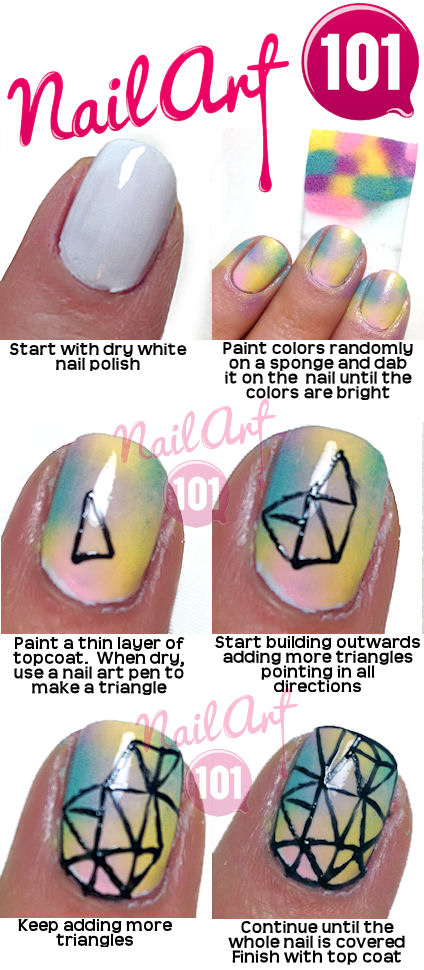
This crystal nails tutorial is completely inspired by the talented tattoo artist Lauren Winzer. I've been following her on instagram (@laurenwinzer) for ages and I am completely in love with her unique, girly style of tattooing. She has this crystal style line work that's become her signature, and I wanted to try it out as an homage to her! Well let me tell you, if I had respect for her before, I have even more now. This look was not easy, but the end design is so beautiful it's totally worth the effort! If I'm ever in Australia (and overcome my fear of needles) I'll be getting a tattoo from her for sure!
In this tutorial I used Sally Hansen Extreme Wear in White On, NYC in Lexington Yellow, ACO in Ballet Shoes, China Glaze in For Audrey, Nailtini in Parfait Amour and Seche Vite top coat and OPI Nail Envy base coat. The nail art pen is a cheap one I bought off ebay!
tips & tricks
Still have some questions? Send me an email and I'll talk you through any problems you're having. Don't forget to email me a photo of your Acid Wash Nails so I can see your beautiful work!
No comments:
Post a Comment